Portable Chainsaw Mill Guide: Straighter, Even Slabs
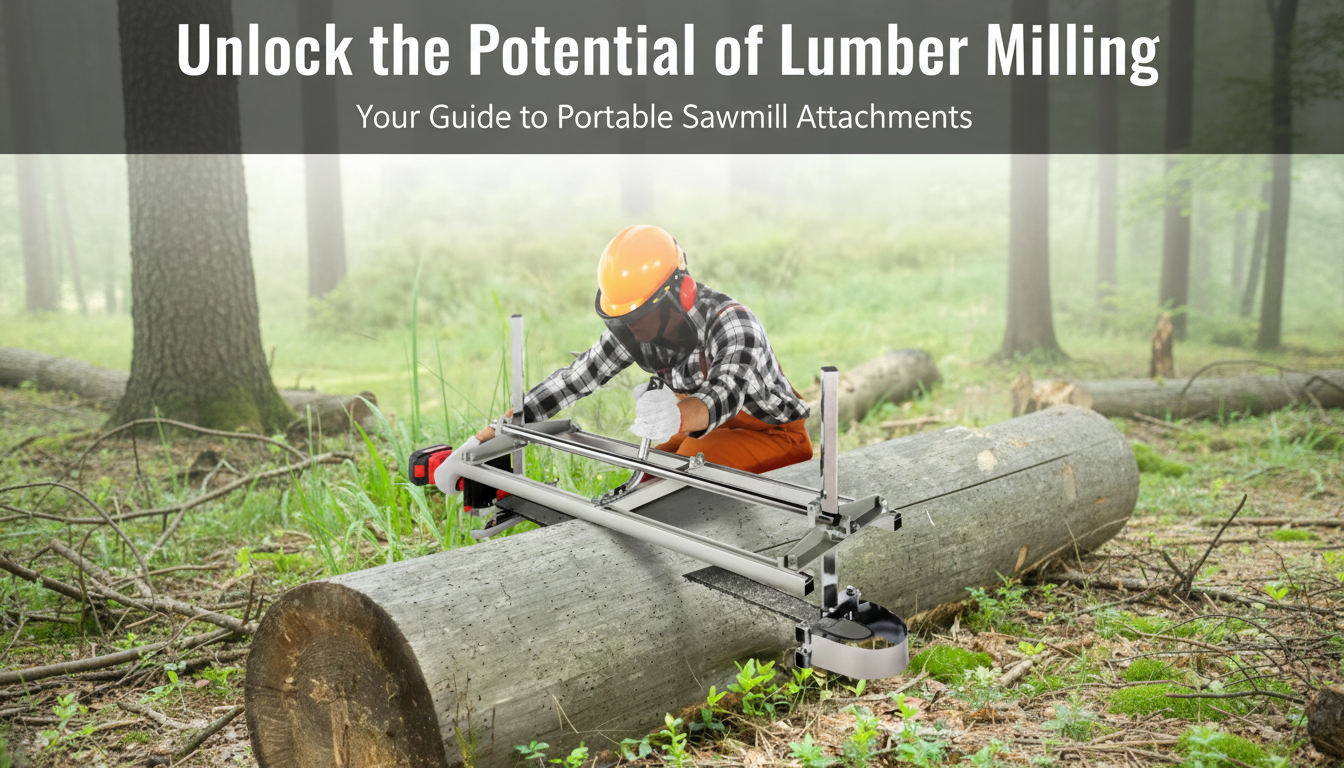
Portable Chainsaw Mill: Adjustable Guide for Straight, Accurate Lumber Cuts
Turning logs into usable boards doesn’t have to require a full-size sawmill. A portable chainsaw mill uses an adjustable guide to keep cuts straight and repeatable, helping produce consistent slabs for DIY builds, woodworking, and on-site milling. With a solid first-cut reference and a properly set-up saw, you can turn storm-fallen timber or backyard logs into practical lumber without hauling heavy equipment to a shop.
What a portable chainsaw mill does
A portable chainsaw mill converts logs into slabs and boards by guiding a chainsaw along a fixed, level track. Instead of freehand ripping—where small wrist changes create waves, taper, and uneven thickness—the mill’s frame rides on rails that keep the bar at a consistent angle through the cut.
- Guides a chainsaw along a straight reference to produce slabs and boards.
- Uses an adjustable frame so thickness can be set and repeated from pass to pass.
- Improves straightness and consistency compared with freehand ripping.
- Works well for remote jobsites, storm cleanup, and small-batch milling.
How the adjustable sawmill guide improves accuracy
Accuracy comes from controlling three things at once: height, alignment, and stability. An adjustable guide lets you set a target thickness and lock it in so the mill doesn’t creep during long cuts. Parallel rails keep the bar angle consistent, reducing taper from one end of the slab to the other. A rigid clamp/attachment point also reduces vibration transfer, which helps avoid chatter marks and washboarding.
For the cleanest results, pair the guide with a steady feed rate and a sharp chain designed for ripping. If the saw is forced, or the chain is dull, the mill can still track straight but leave a rough surface that needs heavier planing later.
Common causes of uneven slabs and quick fixes
| Issue | What it looks like | Adjustment to try |
|---|---|---|
| Guide not level on first pass | Wavy first face; later boards inherit the error | Use a straight ladder/rail and shim until level end-to-end |
| Chain dull or wrong type | Burning, slow feed, washboarding | Sharpen or switch to a ripping chain; verify depth gauges |
| Uneven pressure while pushing | Tapered thickness, chatter marks | Keep steady feed; let the mill ride the rail, not arm force |
| Bar flex on long cuts | Cupped or inconsistent thickness | Use a longer, stiffer bar if needed; avoid forcing the cut |
| Loose fasteners | Drift or sudden change in thickness | Re-check all bolts/knobs before each pass |
Setup basics for clean, repeatable cuts
The first cut matters most because it creates the reference face everything else rides on. Start by choosing a straight, stable guide—many users rely on a ladder, a straight 2x, or a dedicated milling rail screwed into sacrificial blocks that are attached to the log. Take the time to level it end-to-end; if the guide is twisted, the slab will mirror that twist.
- Pick a reliable first-cut reference (ladder, straight 2x, or rail on sacrificial blocks).
- Stabilize the log so it cannot roll; wedge it and clear bark bumps where the guide rides.
- Set thickness with the adjustable posts, then measure both ends before starting the cut.
- Make the first face slowly; once flat, later passes are faster because they reference the milled surface.
- Plan for kerf and drying—cut slightly thick if boards will be surfaced later.
A practical workflow is to mark your target thickness on both ends of the log, set the mill to match, and confirm the measurement at the front and rear posts before each pass. Small differences add up over long cuts, especially on wide slabs.
Chainsaw and chain considerations
Safety and jobsite workflow
For additional safety guidance, consult resources from OSHA’s chainsaw safety topic page and the USDA Forest Service training and safety materials.
When a portable mill is the right choice
Product option: Portable Chainsaw Mill – Adjustable Sawmill Guide for Precise Wood Cutting
If you want straighter, more consistent cuts than freehand ripping, an adjustable mill frame can make the difference between “rough slab” and “usable board.” The Portable Chainsaw Mill – Adjustable Sawmill Guide for Precise Wood Cutting is built to guide a chainsaw for repeatable passes, helping maintain thickness from end to end when the first-cut rail is level and the chain is sharp.
For a simple, stable staging surface at the jobsite—like holding wedges, fuel, tools, and measuring gear—the Portable Folding Camping Table can help keep essentials off the ground and within reach during long milling sessions.
Quick specs to confirm before purchase
| Check | Why it matters |
|---|---|
| Max cut width compatibility | Determines the largest log diameter/slab width that can be milled |
| Bar length fit | Ensures the frame works with the chainsaw bar being used |
| Adjustment range and locking | Affects thickness repeatability and resistance to drift |
| Frame rigidity | Reduces chatter and improves surface consistency |
FAQ
Do you need a special chain for milling lumber?
A ripping chain is strongly recommended because it’s designed for long-grain cutting, often producing a smoother surface with less vibration than a standard crosscut chain. Regardless of chain type, sharp cutters and correctly set depth gauges have the biggest impact on effort and cut quality.
How do you make the first cut straight on a round log?
Fasten a straight ladder or rail to the log using screws into sacrificial blocks, then shim and level it end-to-end before cutting. That first flat face becomes the reference surface for the mill on all later passes.
Why are my slabs coming out uneven in thickness?
Common causes include an unlevel first-pass guide, loose mill fasteners, inconsistent feed pressure, a dull chain, or bar flex on long cuts. Measure the mill height at both ends before each pass and re-tighten knobs/bolts so the setting doesn’t drift mid-cut.















Leave a comment